In this lesson, you'll learn how to write simple applets in Borland JBuilder, and how to use the design view to construct a graphical user-interface (GUI). An applet is an executable program that runs inside a browser, such as Netscape or Internet Explorer. We'll create a simple applet, and learn how they work.
Create a new project, called "AppletDemo", as explained in the previous lesson. Remember the name of the directory where you create your project - we'll need this information.
eg - If your project name was "c:\JBuilder\myprojects\week2\week2.jpr", your project directory is "c:\JBuilder\myprojects\week2\"
An applet is a class that is executed under the control of a world-wide-web browser, such as Netscape Navigator or Internet Explorer. We'll create a new class, called AppletDemo, that runs as an applet.
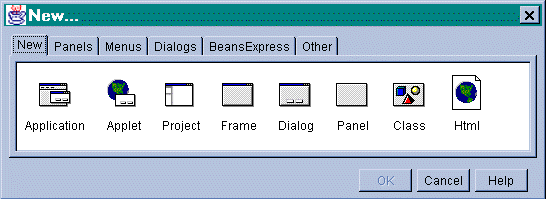
Figure 1.0 - New object dialog allows you to insert a new class into your project.
After clicking OK, the "New Object" dialog box will appear. This allows you to customize the class details. Enter 'AppletDemo' in the name field, and 'java.applet.Applet' in the extends field. This tells JBuilder that our new class will inherit all the properties of an applet. By default, JBuilder will also put your new classes in the current package - but for the purpose of this tutorial, remove the package declaration. Leave the other fields as they are for now, and click OK.
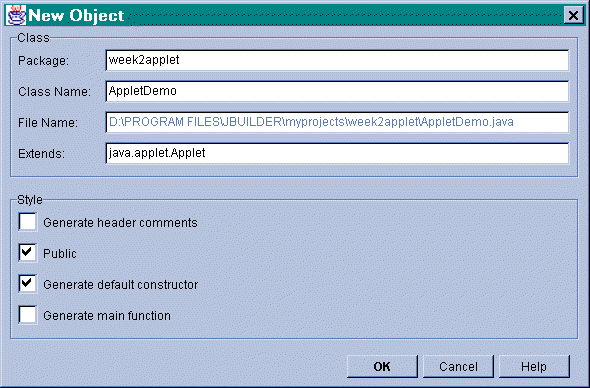
Figure 2.0 - New object dialog allows you to insert a new class into your project.
JBuilder automatically creates code for us, but will need to supplement it with out own. Our applet will display a texfield (allowing users to type in a URL), and a button. When a user clicks on the button, the web browser will load the page located at the URL.
Modify the source for AppletDemo.java, until it looks like the following listing, and then build the project.
import java.awt.*;
import java.applet.*;
import java.net.*;

public class AppletDemo extends Applet
{
       // Member variables of applet
       TextField urlField;
       Button    goButton;

       // Default constructor
       public AppletDemo() {
       }

       // Initialization code for applet
       public void init()
       {

              // Create a text field of size 15 using the 'new' keyword
              urlField = new TextField(15);

              // Create a new button, labelled Go!
              goButton = new Button("Go!");

              // Add text field and button to our applet's GUI
              add(urlField);
              add(goButton);

              repaint();
       }

       public void browse(String url)
       {
              try
              {
                 AppletContext ac = getAppletContext();
                 ac.showDocument ( new URL(url) );
              }
              catch (Exception e)
              {

              }
       }

       // Action handlers respond to user interface events
       public boolean action(Event evt, Object obj)
       {
              String location = urlField.getText();
              browse (location);

              // Return true, since we performed an action
              return true;
       }
}
Once you've typed out the listing, and compiled it, your applet is almost complete. You'll also need to create a new HTML page. Click on the 'Add to Project' button, to create a new file. Call this file "AppletDemo.html".
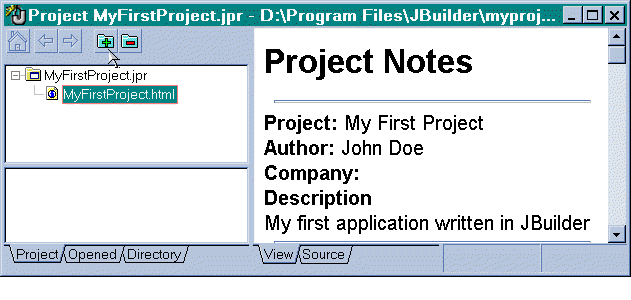
Figure 3.0 - Project view allows you to insert new files into the project
Once you've created a HTML file, click on the 'Source' tab to edit it. Add the following code to your HTML page :-
<hr>
<center>
<applet code="AppletDemo.class" height=40 width=200>
This applet requires a Java browser
</applet>
</center>

<hr>
Save your file, and you're ready to run the applet!
Our applet is now ready to execute. Save all open files and then load the Netscape browser. From the "File" menu, select the "Open page" menu item. Netscape will prompt you to enter a location. Click on the "Choose File" and enter the location of your project directory. Netscape will display a list of HTML files - choose Week2Applet.html.
Hint - If your project name was "c:\JBuilder\myprojects\week2\week2.jpr", your project directory is "c:\JBuilder\myprojects\week2\"
The applet will now be displayed, and you should see the textfield and button. Enter a URL, such as 'http://www.bond.edu.au/', and click "Go!".
At the conclusion of this lesson, you should be able to do the following :-
- Create a new project
- Modify your project's output path, to place your class files with your other project files
- Create a small applet
- Create a HTML page, containing code to display an applet
- Load a HTML page in Netscape from a local drive
|
Copyright 1998, 1999, 2000 David Reilly
|
Privacy | Legal | Linking | Advertise! |
|
Last updated:
Monday, June 05, 2006
|